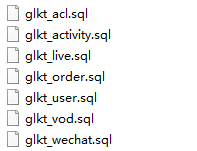
一、搭建项目工程 1、项目数据库设计 1.1、创建数据库和表
1.2、数据库设计规则 以下规则只针对本模块,更全面的文档参考《阿里巴巴Java开发手册》:
1、库名与应用名称尽量一致
2、表名、字段名必须使用小写字母或数字,禁止出现数字开头,
3、表名不使用复数名词
4、表的命名最好是加上“业务名称_表的作用”。如,edu_teacher
5、表必备三字段:id, gmt_create, gmt_modified
说明:
其中 id 必为主键,类型为 bigint unsigned、单表时自增、步长为 1。
(如果使用分库分表集群部署,则id类型为verchar,非自增,业务中使用分布式id生成器)
gmt_create, gmt_modified 的类型均为 datetime 类型,前者现在时表示主动创建,后者过去分词表示被 动更新。
6、单表行数超过 500 万行或者单表容量超过 2GB,才推荐进行分库分表。 说明:如果预计三年后的数据量根本达不到这个级别,请不要在创建表时就分库分表。
7、表达是与否概念的字段,必须使用 is_xxx 的方式命名,数据类型是 unsigned tinyint (1 表示是,0 表示否)。
说明:任何字段如果为非负数,必须是 unsigned。
注意:POJO 类中的任何布尔类型的变量,都不要加 is 前缀。数据库表示是与否的值,使用 tinyint 类型,坚持 is_xxx 的 命名方式是为了明确其取值含义与取值范围。
正例:表达逻辑删除的字段名 is_deleted,1 表示删除,0 表示未删除。
8、小数类型为 decimal,禁止使用 float 和 double。 说明:float 和 double 在存储的时候,存在精度损失的问题,很可能在值的比较时,得到不 正确的结果。如果存储的数据范围超过 decimal 的范围,建议将数据拆成整数和小数分开存储。
9、如果存储的字符串长度几乎相等,使用 char 定长字符串类型。
10、varchar 是可变长字符串,不预先分配存储空间,长度不要超过 5000,如果存储长度大于此值,定义字段类型为 text,独立出来一张表,用主键来对应,避免影响其它字段索 引效率。
11、唯一索引名为 uk_字段名;普通索引名则为 idx_字段名。
说明:uk_ 即 unique key;idx_ 即 index 的简称
12、不得使用外键与级联,一切外键概念必须在应用层解决。外键与级联更新适用于单机低并发,不适合分布式、高并发集群;级联更新是强阻塞,存在数据库更新风暴的风险;外键影响数据库的插入速度。
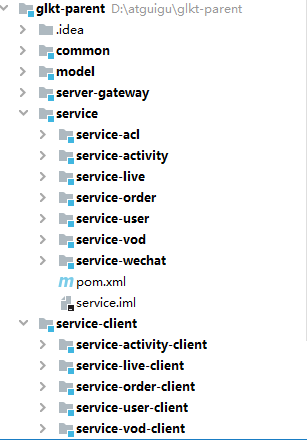
2、工程目录结构
模块说明
**ggkt_parent:**硅谷课堂根目录(父工程),管理多个子模块:
common:公共模块父节点
common_util:工具类模块,所有模块都可以依赖于它
service_utils:service服务的base包,包含service服务的公共配置类,所有service模块依赖于它
rabbit_utils:rabbitmq封装工具类
model:实体类相关模块
server-gateway:服务网关
service:api接口服务父节点
service_acl:权限管理接口服务
service_activity:优惠券api接口服务
service_live:直播课程api接口服务
service_order:订单api接口服务
service_user:用户api接口服务
service_vod:点播课程 api接口服务
service_wechat:公众号api接口服务
service-client:feign服务调用父节点
service-activity-client:优惠券api接口
service-live-client:直播课程api接口
service-order-client:订单api接口
service-user-client:用户api接口
service-vod-client:点播课程api接口
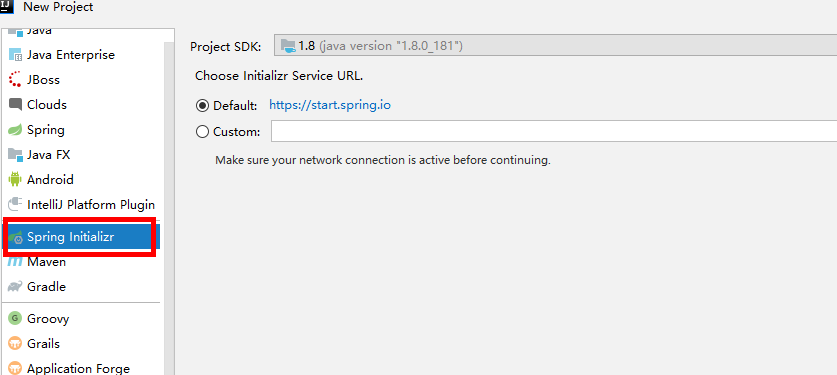
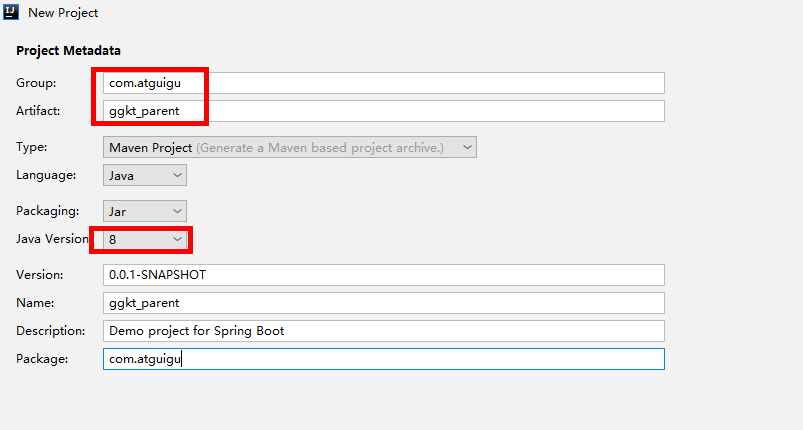
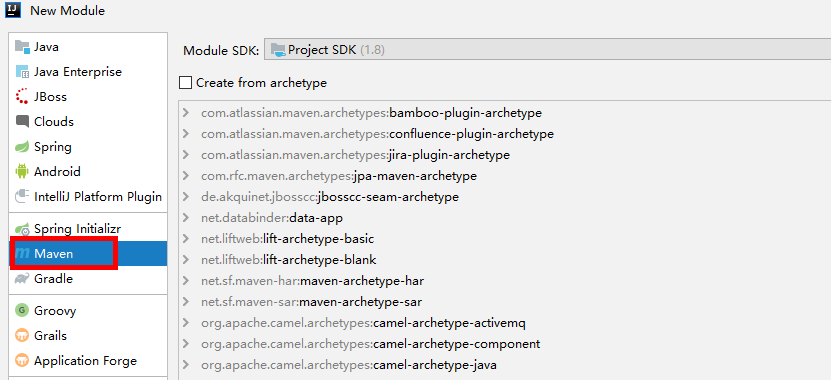
3、创建父工程 3.1、创建父工程ggkt_parent 在idea开发工具中,使用 Spring Initializr 快速初始化一个 Spring Boot 模块
配置:
groupId:com.atguigu
artifactId:ggkt_parent
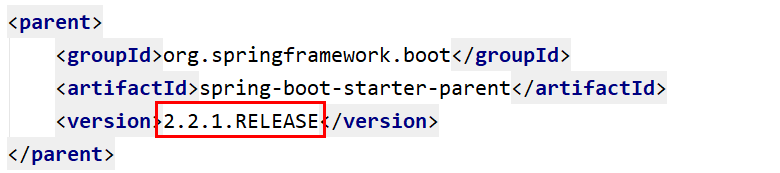
3.2、删除src目录 3.3、引入依赖 修改SpringBoot版本为 :2.2.1.RELEASE
删除,
添加如下依赖
1 2 3 4 5 6 7 8 9 10 11 12 13 14 15 16 17 18 19 20 21 22 23 24 25 26 27 28 29 30 31 32 33 34 35 36 37 38 39 40 41 42 43 44 45 46 47 48 49 50 51 52 53 54 55 56 57 58 59 60 61 62 63 64 65 66 67 68 69 70 71 72 73 74 75 76 77 78 79 80 81 82 83 84 85 86 87 88 89 90 91 92 93 94 95 96 97 98 99 100 101 102 103 104 105 106 107 108 109 110 111 112 113 114 115 116 117 118 119 <properties > <skipTests > true</skipTests > <java.version > 1.8</java.version > <cloud.version > Hoxton.RELEASE</cloud.version > <alibaba.version > 2.2.0.RELEASE</alibaba.version > <mybatis-plus.version > 3.4.1</mybatis-plus.version > <mysql.version > 5.1.46</mysql.version > <swagger.version > 2.9.2</swagger.version > <jwt.version > 0.7.0</jwt.version > <fastjson.version > 1.2.29</fastjson.version > <httpclient.version > 4.5.1</httpclient.version > <easyexcel.version > 2.2.0-beta2</easyexcel.version > <aliyun.version > 4.5.14</aliyun.version > <jodatime.version > 2.10.1</jodatime.version > <jwt.version > 0.7.0</jwt.version > <xxl-job.version > 2.3.0</xxl-job.version > <aliyun.oss.version > 3.9.0</aliyun.oss.version > </properties > <dependencyManagement > <dependencies > <dependency > <groupId > org.springframework.cloud</groupId > <artifactId > spring-cloud-dependencies</artifactId > <version > ${cloud.version}</version > <type > pom</type > <scope > import</scope > </dependency > <dependency > <groupId > com.alibaba.cloud</groupId > <artifactId > spring-cloud-alibaba-dependencies</artifactId > <version > ${alibaba.version}</version > <type > pom</type > <scope > import</scope > </dependency > <dependency > <groupId > com.baomidou</groupId > <artifactId > mybatis-plus-boot-starter</artifactId > <version > ${mybatis-plus.version}</version > </dependency > <dependency > <groupId > mysql</groupId > <artifactId > mysql-connector-java</artifactId > <version > ${mysql.version}</version > </dependency > <dependency > <groupId > com.github.xiaoymin</groupId > <artifactId > knife4j-spring-boot-starter</artifactId > <version > 2.0.8</version > </dependency > <dependency > <groupId > io.jsonwebtoken</groupId > <artifactId > jjwt</artifactId > <version > ${jwt.version}</version > </dependency > <dependency > <groupId > org.apache.httpcomponents</groupId > <artifactId > httpclient</artifactId > <version > ${httpclient.version}</version > </dependency > <dependency > <groupId > com.alibaba</groupId > <artifactId > fastjson</artifactId > <version > ${fastjson.version}</version > </dependency > <dependency > <groupId > com.alibaba</groupId > <artifactId > easyexcel</artifactId > <version > ${easyexcel.version}</version > </dependency > <dependency > <groupId > com.aliyun</groupId > <artifactId > aliyun-java-sdk-core</artifactId > <version > ${aliyun.version}</version > </dependency > <dependency > <groupId > com.aliyun.oss</groupId > <artifactId > aliyun-sdk-oss</artifactId > <version > ${aliyun.oss.version}</version > </dependency > <dependency > <groupId > joda-time</groupId > <artifactId > joda-time</artifactId > <version > ${jodatime.version}</version > </dependency > <dependency > <groupId > com.xuxueli</groupId > <artifactId > xxl-job-core</artifactId > <version > ${xxl-job.version}</version > </dependency > <dependency > <groupId > io.springfox</groupId > <artifactId > springfox-swagger2</artifactId > <version > ${swagger.version}</version > </dependency > <dependency > <groupId > io.springfox</groupId > <artifactId > springfox-swagger-ui</artifactId > <version > ${swagger.version}</version > </dependency > </dependencies > </dependencyManagement >
4、创建model模块 4.1、创建子模块model
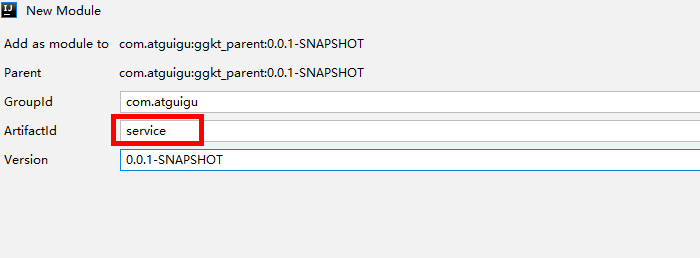
4.2、配置模块 groupId:com.atguigu
artifactId:model
4.3、引入依赖 1 2 3 4 5 6 7 8 9 10 11 12 13 14 15 16 17 18 19 20 21 22 23 24 25 26 27 28 29 30 31 32 33 34 35 36 37 38 39 40 41 42 43 44 <dependencies > <dependency > <groupId > org.projectlombok</groupId > <artifactId > lombok</artifactId > </dependency > <dependency > <groupId > com.baomidou</groupId > <artifactId > mybatis-plus-boot-starter</artifactId > <scope > provided </scope > </dependency > <dependency > <groupId > com.alibaba</groupId > <artifactId > easyexcel</artifactId > <scope > provided </scope > </dependency > <dependency > <groupId > com.github.xiaoymin</groupId > <artifactId > knife4j-spring-boot-starter</artifactId > <scope > provided</scope > </dependency > <dependency > <groupId > org.springframework.boot</groupId > <artifactId > spring-boot-starter-data-mongodb</artifactId > <scope > provided </scope > </dependency > <dependency > <groupId > com.alibaba</groupId > <artifactId > fastjson</artifactId > <scope > provided </scope > </dependency > <dependency > <groupId > org.springframework.boot</groupId > <artifactId > spring-boot-starter-data-elasticsearch</artifactId > <scope > provided </scope > </dependency > </dependencies >
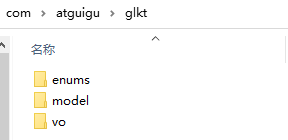
4.4、复制model代码
5、创建service模块 5.1、创建子模块service
5.2、service模块引入依赖 1 2 3 4 5 6 7 8 9 10 11 12 13 14 15 16 17 18 19 20 21 22 23 24 25 26 27 28 29 30 31 32 33 34 35 36 37 38 39 40 41 42 43 44 45 46 47 48 49 50 51 <dependencies > <dependency > <groupId > com.atguigu</groupId > <artifactId > model</artifactId > <version > 0.0.1-SNAPSHOT</version > </dependency > <dependency > <groupId > org.springframework.boot</groupId > <artifactId > spring-boot-starter-web</artifactId > </dependency > <dependency > <groupId > com.baomidou</groupId > <artifactId > mybatis-plus-boot-starter</artifactId > </dependency > <dependency > <groupId > mysql</groupId > <artifactId > mysql-connector-java</artifactId > </dependency > <dependency > <groupId > com.alibaba.cloud</groupId > <artifactId > spring-cloud-starter-alibaba-nacos-discovery</artifactId > </dependency > <dependency > <groupId > org.springframework.cloud</groupId > <artifactId > spring-cloud-starter-openfeign</artifactId > </dependency > <dependency > <groupId > com.alibaba.cloud</groupId > <artifactId > spring-cloud-starter-alibaba-sentinel</artifactId > </dependency > <dependency > <groupId > org.springframework.boot</groupId > <artifactId > spring-boot-devtools</artifactId > <optional > true</optional > </dependency > </dependencies >
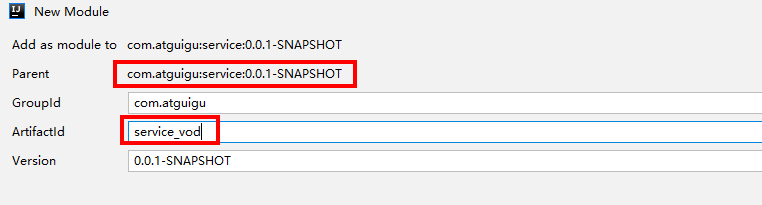
6、创建service_vod模块 在service模块创建子模块service_vod
二、后台管理系统-讲师管理接口 1、讲师管理模块需求 添加课程时候,需要选择所属讲师,所以要对讲师进行管理,就是基于讲师的CRUD操作
2、讲师管理模块配置 2.1、生成模块代码 (1)引入代码生成器依赖
1 2 3 4 5 6 7 8 9 10 11 <dependency > <groupId > com.baomidou</groupId > <artifactId > mybatis-plus-generator</artifactId > <version > 3.3.1</version > </dependency > <dependency > <groupId > org.apache.velocity</groupId > <artifactId > velocity-engine-core</artifactId > <version > 2.0</version > </dependency >
(2)复制生成代码工具类
修改代码中路径、数据库、包和表,复制到test目录下
(3)实体类统一替换为model模块的实体类
2.2、创建配置文件和启动类 配置文件
1 2 3 4 5 6 7 8 9 10 11 12 13 14 15 16 17 18 19 20 server.port =8301 spring.application.name =service-vod spring.profiles.active =dev spring.datasource.driver-class-name =com.mysql.jdbc.Driver spring.datasource.url =jdbc:mysql://localhost:3306/glkt_vod?characterEncoding=utf-8&useSSL=false spring.datasource.username =root spring.datasource.password =root spring.jackson.date-format =yyyy-MM-dd HH:mm:ss spring.jackson.time-zone =GMT+8 mybatis-plus.configuration.log-impl =org.apache.ibatis.logging.stdout.StdOutImpl
启动类
1 2 3 4 5 6 @SpringBootApplication public class ServiceVodApplication { public static void main (String[] args) { SpringApplication.run(ServiceVodApplication.class, args); } }
3、查询所有讲师列表接口 3.1、编写controller 1 2 3 4 5 6 7 8 9 10 11 12 13 14 15 16 17 18 @RestController @RequestMapping(value="/admin/vod/teacher") public class TeacherController { @Autowired private TeacherService teacherService; @GetMapping("findAll") public List<Teacher> findAll () { List<Teacher> list = teacherService.list(); return list; } }
3.2、编写配置类 1 2 3 4 5 6 7 8 @Configuration @MapperScan("com.atguigu.ggkt.vod.mapper") public class VodConfig { }
3.3、运行启动类 访问http://localhost:8301/admin/vod/teacher/findAll
得到json数据
4、逻辑删除讲师接口 4.1、编写controller TeacherController添加删除方法
1 2 3 4 5 @DeleteMapping("remove/{id}") public boolean removeById (@PathVariable String id) { return teacherService.removeById(id); }
因为删除讲师接口是delete提交方式,使用浏览器无法直接访问测试,可以通过工具测试,比如Postman,我们这里通过整合Swagger2进行接口测试
5、配置Swagger2生成API接口文档 5.1、概述 前后端分离开发模式中,api文档是最好的沟通方式。Swagger 是一个规范和完整的框架,用于生成、描述、调用和可视化 RESTful 风格的 Web 服务。及时性 (接口变更后,能够及时准确地通知相关前后端开发人员)规范性 (并且保证接口的规范性,如接口的地址,请求方式,参数及响应格式和错误信息)一致性 (接口信息一致,不会出现因开发人员拿到的文档版本不一致,而出现分歧)可测性 (直接在接口文档上进行测试,以方便理解业务)
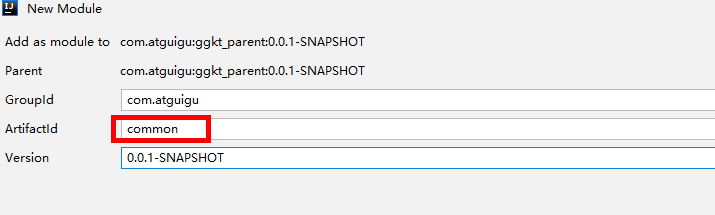
5.2、配置Swagger2 (1)在ggkt_parent下创建子模块common
(2)在common模块引入依赖
1 2 3 4 5 6 7 8 9 10 11 12 13 14 15 16 17 18 19 20 21 22 23 24 25 26 27 28 29 30 31 32 33 34 35 <dependencies > <dependency > <groupId > org.springframework.boot</groupId > <artifactId > spring-boot-starter-web</artifactId > <scope > provided </scope > </dependency > <dependency > <groupId > com.baomidou</groupId > <artifactId > mybatis-plus-boot-starter</artifactId > <scope > provided </scope > </dependency > <dependency > <groupId > org.projectlombok</groupId > <artifactId > lombok</artifactId > </dependency > <dependency > <groupId > io.springfox</groupId > <artifactId > springfox-swagger2</artifactId > </dependency > <dependency > <groupId > io.springfox</groupId > <artifactId > springfox-swagger-ui</artifactId > </dependency > <dependency > <groupId > com.alibaba</groupId > <artifactId > fastjson</artifactId > </dependency > </dependencies >
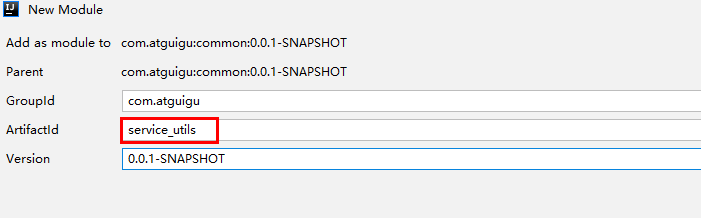
(3)在common下创建子模块service_utils
(4)在service_utils创建swagger2配置类
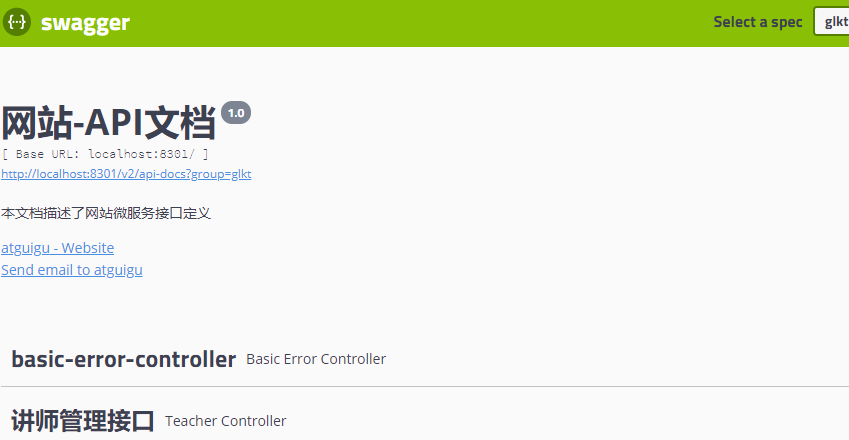
1 2 3 4 5 6 7 8 9 10 11 12 13 14 15 16 17 18 19 20 21 22 23 24 25 26 27 28 29 30 31 32 import org.springframework.context.annotation.Bean;import org.springframework.context.annotation.Configuration;import springfox.documentation.builders.ApiInfoBuilder;import springfox.documentation.service.ApiInfo;import springfox.documentation.service.Contact;import springfox.documentation.spi.DocumentationType;import springfox.documentation.spring.web.plugins.Docket;import springfox.documentation.swagger2.annotations.EnableSwagger2;@Configuration @EnableSwagger2 public class Swagger2Config { @Bean public Docket webApiConfig () { return new Docket (DocumentationType.SWAGGER_2) .groupName("ggkt" ) .apiInfo(webApiInfo()) .select() .build(); } private ApiInfo webApiInfo () { return new ApiInfoBuilder () .title("网站-API文档" ) .description("本文档描述了网站微服务接口定义" ) .version("1.0" ) .contact(new Contact ("atguigu" , "http://atguigu.com" , "atguigu.com" )) .build(); } }
(5)在service模块引入service_utils依赖
1 2 3 4 5 <dependency > <groupId > com.atguigu</groupId > <artifactId > service_utils</artifactId > <version > 0.0.1-SNAPSHOT</version > </dependency >
(6)在service_vod启动类上添加注解,进行测试
1 2 3 4 5 6 7 @SpringBootApplication @ComponentScan("com.atguigu") public class ServiceVodApplication { public static void main (String[] args) { SpringApplication.run(ServiceVodApplication.class, args); } }
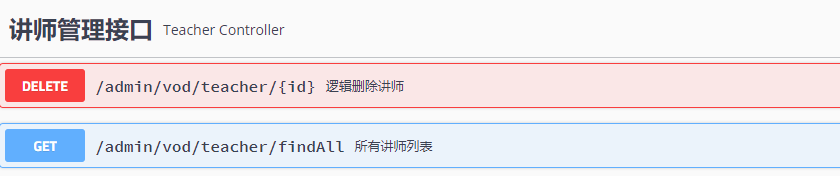
5.3、定义接口说明和参数说明 定义在类上:@Api
定义在方法上:@ApiOperation
定义在参数上:@ApiParam
1 2 3 4 5 6 7 8 9 10 11 12 13 14 15 16 17 18 19 20 21 22 23 @Api(tags = "讲师管理接口") @RestController @RequestMapping(value="/admin/vod/teacher") public class TeacherController { @Autowired private TeacherService teacherService; @ApiOperation("逻辑删除讲师") @DeleteMapping("{id}") public boolean removeById (@ApiParam(name = "id", value = "ID", required = true) @PathVariable String id) { return teacherService.removeById(id); } @ApiOperation("所有讲师列表") @GetMapping("findAll") public List<Teacher> findAll () { List<Teacher> list = teacherService.list(); return list; } }
5.4、swagger2测试 (1)浏览器输入固定地址 http://localhost:8301/swagger-ui.html
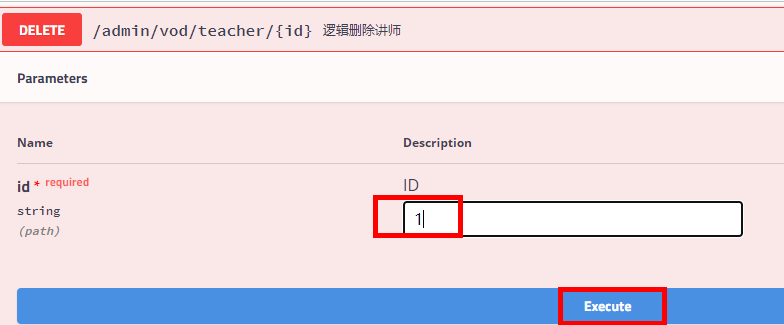
(2)测试接口
(3)执行接口
6、定义统一返回结果对象 项目中我们会将响应封装成json返回,一般我们会将所有接口的数据格式统一, 使前端(iOS Android, Web)对数据的操作更一致、轻松。
一般情况下,统一返回数据格式没有固定的格式,只要能描述清楚返回的数据状态以及要返回的具体数据就可以。但是一般会包含状态码、返回消息、数据这几部分内容
例如,我们的系统要求返回的基本数据格式如下:
列表:
1 2 3 4 5 6 7 8 9 10 11 12 { "code" : 200 , "message" : "成功" , "data" : [ { "id" : 2 , "name" : "欧阳老师" , "intro" : "高级讲师" } ] , "ok" : true }
分页:
1 2 3 4 5 6 7 8 9 10 11 12 13 14 15 16 17 18 19 20 21 22 23 24 25 26 27 28 29 30 31 { "code" : 200 , "message" : "成功" , "data" : { "records" : [ { "id" : 2 , "name" : "欧阳老师" , "intro" : "高级讲师" } , { "id" : 4 , "name" : "上官老师" , "intro" : "高级讲师" } , { "id" : 5 , "name" : "东方老师" , "intro" : "高级老师" } ] , "total" : 10 , "size" : 3 , "current" : 1 , "orders" : [ ] , "hitCount" : false , "searchCount" : true , "pages" : 2 } , "ok" : true }
没有返回数据:
1 2 3 4 5 6 { "code" : 200 , "message" : "成功" , "data" : null , "ok" : true }
失败:
1 2 3 4 5 6 { "code" : 201 , "message" : "失败" , "data" : null , "ok" : false }
6.1、创建结果类 在service_utils模块创建interfacle定义返回状态码
1 2 3 4 5 6 7 8 9 10 11 12 13 14 15 16 17 18 19 20 21 22 23 24 25 26 27 28 29 30 31 32 33 34 35 36 37 38 39 40 import lombok.Getter;@Getter public enum ResultCodeEnum { SUCCESS(200 ,"成功" ), FAIL(201 , "失败" ), SERVICE_ERROR(2012 , "服务异常" ), DATA_ERROR(204 , "数据异常" ), ILLEGAL_REQUEST(205 , "非法请求" ), REPEAT_SUBMIT(206 , "重复提交" ), LOGIN_AUTH(208 , "未登陆" ), PERMISSION(209 , "没有权限" ), PHONE_CODE_ERROR(211 , "手机验证码错误" ), MTCLOUD_ERROR(210 , "直播接口异常" ), COUPON_GET(220 , "优惠券已经领取" ), COUPON_LIMIT_GET(221 , "优惠券已发放完毕" ), FILE_UPLOAD_ERROR( 21004 , "文件上传错误" ), FILE_DELETE_ERROR( 21005 , "文件刪除错误" ), VOD_PALY_ERROR(209 , "请购买后观看" ),; private Integer code; private String message; private ResultCodeEnum (Integer code, String message) { this .code = code; this .message = message; } }
在service_utils模块创建结果类
1 2 3 4 5 6 7 8 9 10 11 12 13 14 15 16 17 18 19 20 21 22 23 24 25 26 27 28 29 30 31 32 33 34 35 36 37 38 39 40 41 42 43 44 45 46 47 48 49 50 51 52 53 54 55 56 57 58 59 60 61 62 63 64 65 66 67 68 69 70 71 import io.swagger.annotations.ApiModel;import io.swagger.annotations.ApiModelProperty;import lombok.Data;@Data @ApiModel(value = "全局统一返回结果") public class Result <T> { @ApiModelProperty(value = "返回码") private Integer code; @ApiModelProperty(value = "返回消息") private String message; @ApiModelProperty(value = "返回数据") private T data; public Result () {} public static <T> Result<T> build (T body, Integer code, String message) { Result<T> result = new Result <T>(); if (body != null ) { result.setData(body); } result.setCode(code); result.setMessage(message); return result; } public static <T> Result<T> ok () { return Result.ok(null ); } public static <T> Result<T> ok (T data) { return build(data,200 ,"成功" ); } public static <T> Result<T> fail () { return Result.fail(null ); } public static <T> Result<T> fail (T data) { return build(data, 201 ,"失败" ); } public Result<T> message (String msg) { this .setMessage(msg); return this ; } public Result<T> code (Integer code) { this .setCode(code); return this ; } }
6.2、修改controller返回结果 1 2 3 4 5 6 7 8 9 10 11 12 13 14 15 16 17 18 19 20 21 22 23 24 25 26 27 28 29 30 31 32 @Api(tags = "讲师管理接口") @RestController @RequestMapping(value="/admin/vod/teacher") public class TeacherController { @Autowired private TeacherService teacherService; @ApiOperation("查询所有讲师") @GetMapping("findAll") public Result findAllTeacher () { List<Teacher> list = teacherService.list(); return Result.ok(list).message("查询数据成功" ); } @ApiOperation("逻辑删除讲师") @DeleteMapping("remove/{id}") public Result removeTeacher (@ApiParam(name = "id", value = "ID", required = true) @PathVariable Long id) { boolean isSuccess = teacherService.removeById(id); if (isSuccess) { return Result.ok(null ); } else { return Result.fail(null ); } } }
7、条件分页查询讲师列表接口 7.1、创建配置类 1 2 3 4 5 6 7 8 9 10 11 12 13 14 @Configuration @MapperScan("com.atguigu.ggkt.vod.mapper") public class VodConfig { @Bean public PaginationInterceptor paginationInterceptor () { return new PaginationInterceptor (); } }
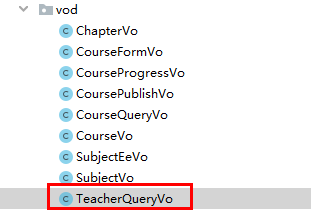
7.2、创建查询条件对象
1 2 3 4 5 6 7 8 9 10 11 12 13 14 15 @Data public class TeacherQueryVo { @ApiModelProperty(value = "讲师姓名") private String name; @ApiModelProperty(value = "头衔 1高级讲师 2首席讲师") private Integer level; @ApiModelProperty(value = "入驻时间") private String joinDateBegin; @ApiModelProperty(value = "入驻时间") private String joinDateEnd; }
7.3、编写controller 1 2 3 4 5 6 7 8 9 10 11 12 13 14 15 16 17 18 19 20 21 22 23 24 25 26 27 28 29 30 31 32 33 34 35 @ApiOperation(value = "获取分页列表") @PostMapping("{page}/{limit}") public Result index ( @ApiParam(name = "page", value = "当前页码", required = true) @PathVariable Long page, @ApiParam(name = "limit", value = "每页记录数", required = true) @PathVariable Long limit, @ApiParam(name = "teacherVo", value = "查询对象", required = false) @RequestBody(required = false) TeacherQueryVo teacherQueryVo) { Page<Teacher> pageParam = new Page <>(page, limit); String name = teacherQueryVo.getName(); Integer level = teacherQueryVo.getLevel(); String joinDateBegin = teacherQueryVo.getJoinDateBegin(); String joinDateEnd = teacherQueryVo.getJoinDateEnd(); QueryWrapper<Teacher> wrapper = new QueryWrapper <>(); if (!StringUtils.isEmpty(name)) { wrapper.like("name" ,name); } if (!StringUtils.isEmpty(level)) { wrapper.eq("level" ,level); } if (!StringUtils.isEmpty(joinDateBegin)) { wrapper.ge("join_date" ,joinDateBegin); } if (!StringUtils.isEmpty(joinDateEnd)) { wrapper.le("join_date" ,joinDateEnd); } IPage<Teacher> pageModel = teacherService.page(pageParam, wrapper); return Result.ok(pageModel); }
8、添加讲师接口 8.1、编写controller 1 2 3 4 5 6 @ApiOperation(value = "新增") @PostMapping("save") public Result save (@RequestBody Teacher teacher) { teacherService.save(teacher); return Result.ok(null ); }
9、修改讲师接口 9.1、编写id查询方法 1 2 3 4 5 6 @ApiOperation(value = "获取") @GetMapping("get/{id}") public Result get (@PathVariable Long id) { Teacher teacher = teacherService.getById(id); return Result.ok(teacher); }
9.2、编写修改方法 1 2 3 4 5 6 @ApiOperation(value = "修改") @PutMapping("update") public Result updateById (@RequestBody Teacher teacher) { teacherService.updateById(teacher); return Result.ok(null ); }
10、批量删除讲师接口 10.1、编写controller 1 2 3 4 5 6 @ApiOperation(value = "根据id列表删除") @DeleteMapping("batchRemove") public Result batchRemove (@RequestBody List<Long> idList) { teacherService.removeByIds(idList); return Result.ok(null ); }
三、统一异常处理 1、制造异常 除以0
我们想让异常结果也显示为统一的返回结果对象,并且统一处理系统的异常信息,那么需要统一异常处理
2、全局异常处理 2.1、创建统一异常处理器 在service_utils中创建统一异常处理类GlobalExceptionHandler.java:
1 2 3 4 5 6 7 8 9 10 11 12 @ControllerAdvice public class GlobalExceptionHandler { @ExceptionHandler(Exception.class) @ResponseBody public Result error (Exception e) { e.printStackTrace(); return Result.fail().message("执行了全局异常处理" ); } }
2.2、测试 3、处理特定异常 3.1、添加异常处理方法 GlobalExceptionHandler.java中添加
1 2 3 4 5 6 @ExceptionHandler(ArithmeticException.class) @ResponseBody public Result error (ArithmeticException e) { e.printStackTrace(); return Result.fail().message("执行了特定异常处理" ); }
3.2、测试 4、处理自定义异常 4.1、创建自定义异常类 1 2 3 4 5 6 7 @Data @AllArgsConstructor @NoArgsConstructor public class GgktException extends RuntimeException { private Integer code; private String msg; }
4.2、业务中需要位置抛出 1 2 3 4 5 try { int a = 10 /0 ; }catch (Exception e) { throw new GgktException (20001 ,"出现自定义异常" ); }
4.3、添加异常处理方法 GlobalExceptionHandler.java中添加
1 2 3 4 5 6 @ExceptionHandler(GgktException.class) @ResponseBody public Result error (GgktException e) { e.printStackTrace(); return Result.fail().message(e.getMsg()).code(e.getCode()); }
4.4、测试