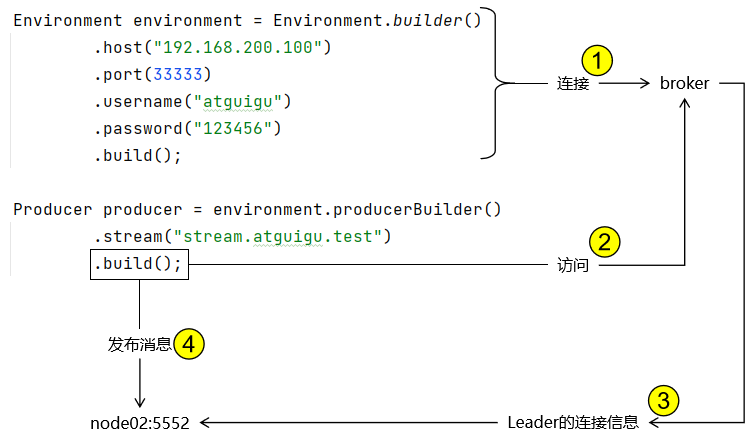
Internally, the Environment will query the broker to find out about the topology of the stream and will create or re-use a connection to publish to the leader node of the stream.
producer.send( producer.messageBuilder().addData(messagePayload).build(), confirmationStatus -> { if (confirmationStatus.isConfirmed()) { System.out.println("[生产者端]the message made it to the broker"); } else { System.out.println("[生产者端]the message did not make it to the broker"); }
The offset is the place in the stream where the consumer starts consuming from. The possible values for the offset parameter are the following:
OffsetSpecification.first(): starting from the first available offset. If the stream has not been truncated, this means the beginning of the stream (offset 0).
OffsetSpecification.last(): starting from the end of the stream and returning the last chunk of messages immediately (if the stream is not empty).
OffsetSpecification.next(): starting from the next offset to be written. Contrary to OffsetSpecification.last(), consuming with OffsetSpecification.next() will not return anything if no-one is publishing to the stream. The broker will start sending messages to the consumer when messages are published to the stream.
OffsetSpecification.offset(offset): starting from the specified offset. 0 means consuming from the beginning of the stream (first messages). The client can also specify any number, for example the offset where it left off in a previous incarnation of the application.
OffsetSpecification.timestamp(timestamp): starting from the messages stored after the specified timestamp. Note consumers can receive messages published a bit before the specified timestamp. Application code can filter out those messages if necessary.